VoiceCtrl Help
Last updated: April 2026
Getting Started
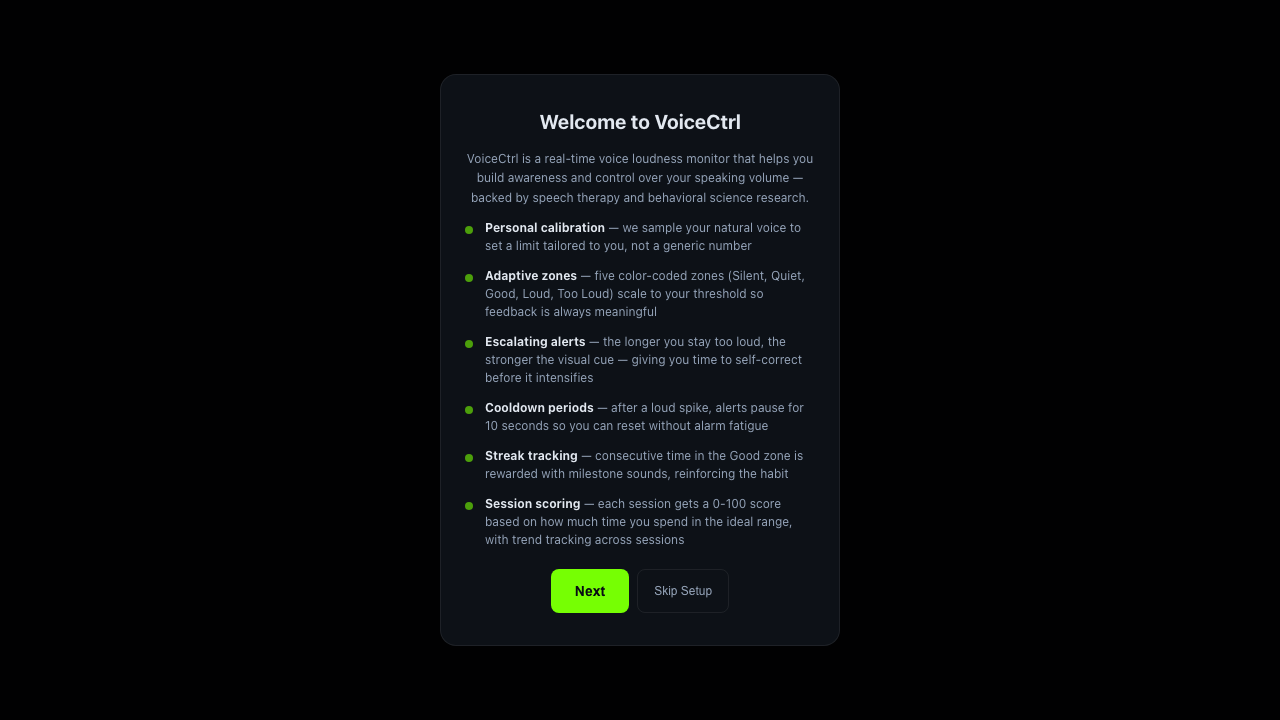
The first time you launch VoiceCtrl you will see a welcome screen that explains the personal calibration, adaptive zones, incoming alerts, cooldown periods, streak tracking and device pairing. Read through it, then press Next to continue. macOS will then ask for permission to access your microphone — grant permission so VoiceCtrl can show your real‑time volume level. Audio is processed locally and is never recorded or transmitted.
The Main View
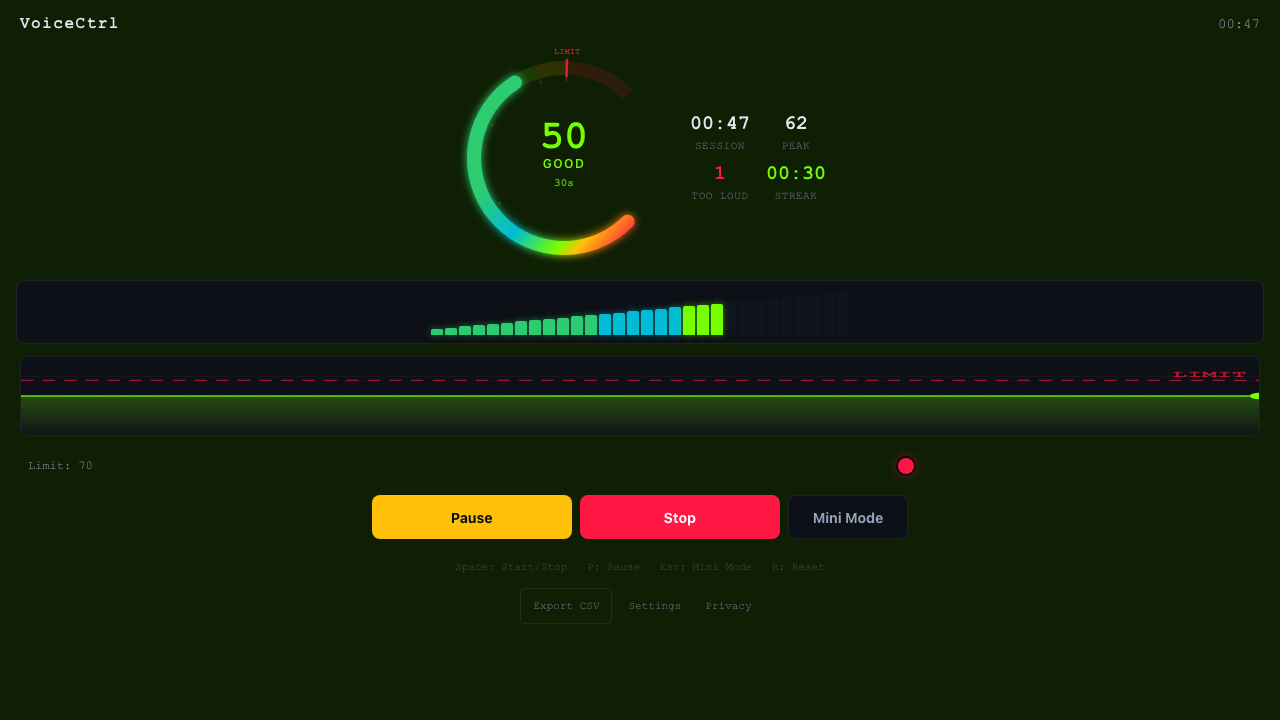
The main window shows a big circular meter with your current level (0–100), the current zone label (Silent, Quiet, Good, Loud, Too Loud), how long you have been speaking at that level, and a row of session stats: total Session time, Peak level reached, the number of Too Loud events and your current Streak time inside the safe zone. A waveform ribbon below the meter shows your recent history against the red Limit line.
Controls
Use the three big buttons under the waveform to manage your session:
- Pause / Resume — temporarily freeze the session timer without losing your stats.
- Stop — end and reset the current session.
- Mini Mode — collapse the window into a compact always‑on‑top overlay.
Keyboard shortcuts: Space Start/Stop · P Pause · Esc Mini Mode · R Reset.
Use Export CSV to save the level history of your session for analysis. Settings opens the preferences panel described below. Privacy links to our privacy policy.
Understanding the Zones
VoiceCtrl classifies your current microphone level into five color‑coded zones:
- Silent — no voice detected.
- Quiet — speaking softly; may be hard to hear.
- Good — ideal speaking volume; stay here.
- Loud — approaching your configured limit.
- Too Loud — above your limit; the meter turns red and the Too Loud counter increases.

Settings
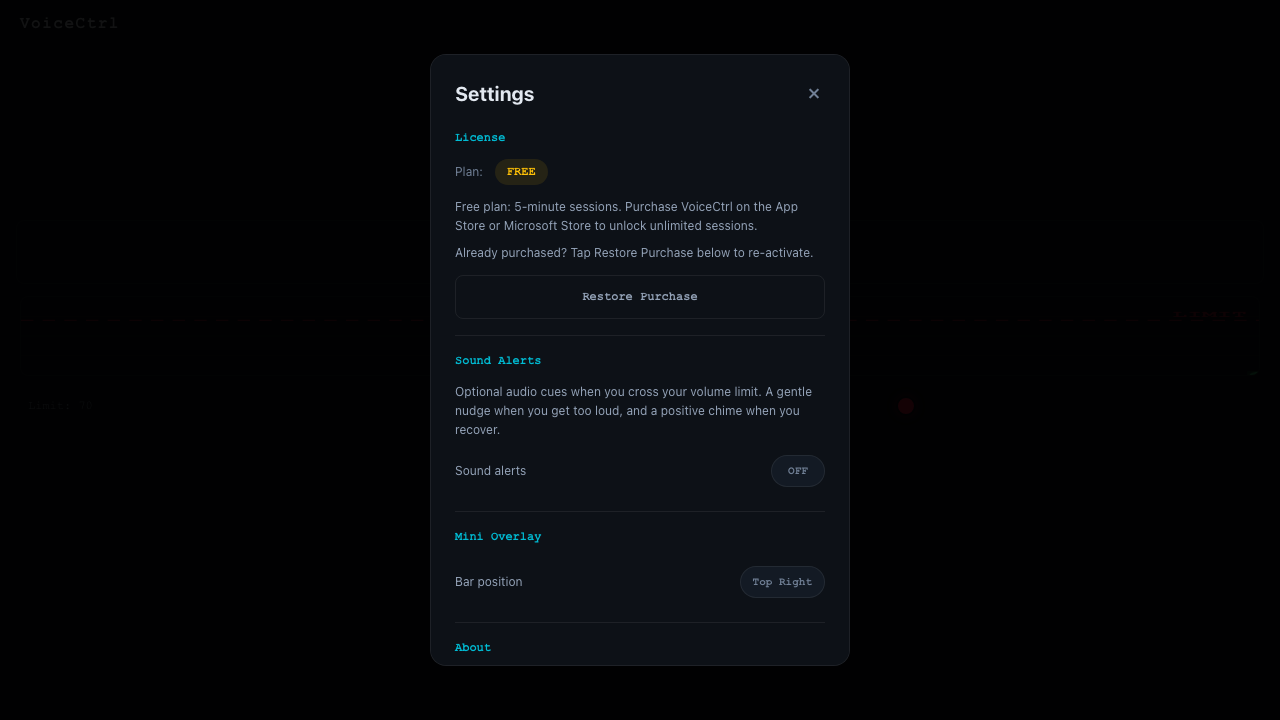
Open Settings from the bottom of the main view. From here you can:
- View your License plan and restore a previous purchase.
- Toggle Sound Alerts — gentle audio cues when you cross the limit and a positive chime when you recover.
- Choose the Mini Overlay bar position (top left or top right).
- See the app version under About.
Mini Mode
Mini Mode collapses VoiceCtrl into a compact always‑on‑top bar that parks itself in a screen corner. A colored level bar, the current zone label and the session time are all that is shown. Use it while gaming, streaming or on a call so you can glance at your volume without interrupting what you are doing. Press Esc to toggle it.

Menu Bar Icon
VoiceCtrl lives in the macOS menu bar. Click the icon to quickly Open the main window, toggle Mini Mode, or Quit the app. Closing the main window does not quit VoiceCtrl — use Quit from the menu bar icon or the application menu.
Troubleshooting
No level is displayed: Open System Settings › Privacy & Security › Microphone and make sure VoiceCtrl is allowed, then restart the app.
Wrong input device: Select your preferred microphone from the device picker at the top of the main view.
Window disappears behind others: Switch to Mini Mode, which pins the overlay above all other windows.
Session ends after five minutes: The free plan caps sessions at five minutes. Purchase VoiceCtrl on the Mac App Store to unlock unlimited sessions.
Still Need Help?
If you run into a problem or have a feature request, email us at support@voicectrl.app.